Steering Wheel Restoration
Restoring worn-out steering wheels is a common practice in the hot rod world. You may need to learn how to repair a steering wheel if you own a high-mileage Mercedes-Benz.
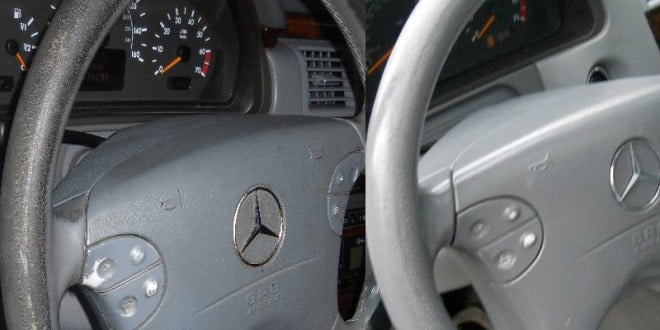
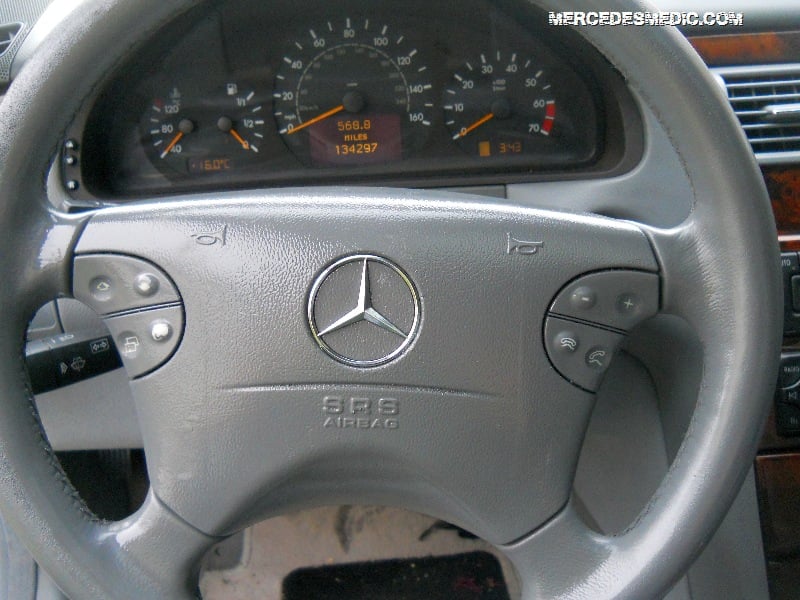
Steering wheels do wear out, not just in Mercedes-Benz but in most cars. On the Mercedes-Benz steering wheel, the control buttons, in particular, don’t hold up very well. They may get discolored, too dirty, and hard to see. Mercedes-Benz cars with as little as 100,000 miles often show wear and tear on the steering wheel. If you want to keep your Mercedes-Benz for a long time, you should either protect the steering wheel with a cover or learn how to restore it. When you clean the steering wheel, be careful with your solutions; some may do more damage than you realize.
If your steering wheel has no wear yet, consider installing a cover. They are inexpensive, and you can find some classy-looking covers. If you browse through Amazon, you will see several interesting options. You can install a Wood Grain Steering Wheel cover or a steering wheel cover that represents your favorite sports team. If you are against using steering wheel covers, follow this tutorial to restore your steering wheel when it wears out. Here we show you the steps and list the tools and materials needed to restore your steering wheel. 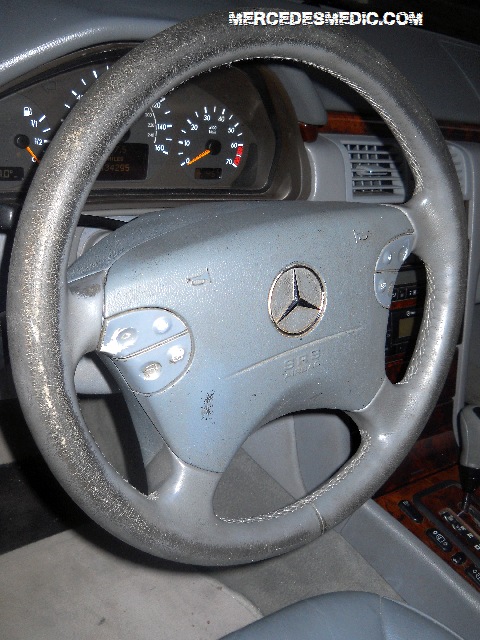
In a few words, this is what you need to do. First, you need to remove the steering wheel. Don’t worry; it is easy. Then you will need to prepare, clean and paint it. You will be able to restore the steering wheel to almost factory condition. If you have a spray gun, you can use it with your color choice of single-stage paint. Since most car owners don’t own a spray gun, we will show how to achieve great results with a spray can.
Tools Needed
Here is a list of the tools that you will need. This is all you need for most Mercedes Benz cars, especially MB cars made after 2000. Some of the older models or other car makes may use a nut or bolt instead of the hex head bolt in the center of the steering wheel.
3/8-Inch Drive Extra Long Torx Socket Set
Materials Needed
For your convenience, we have provided links to Amazon products for the following materials—some of these items you probably already have.
Vinyl and Plastic Spray Paint Color: (White, Gray, Black, Tan, Beige, White)
Clearcoat(For best results)
Masking tape
Steering Wheel Restoration – Step-by-Step DIY Instructions
-
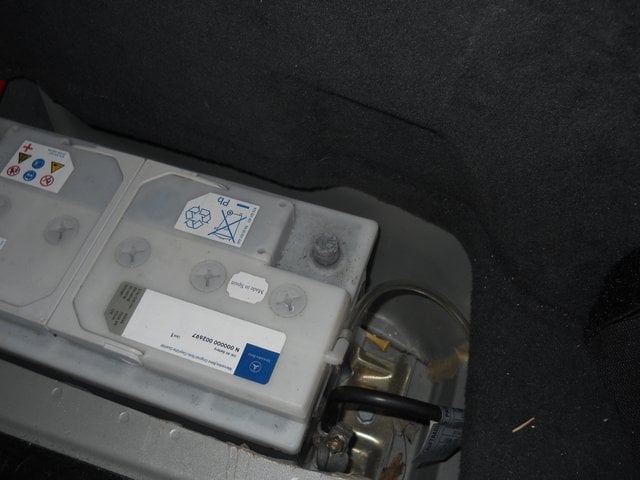
- Disconnect the battery
It is highly recommended that you disconnect the battery before you start this job. If you don’t, ensure not to insert the key in the ignition while removing the airbag, as this will trigger the AirBag / SRS light to turn on. You will need an OBD II scanner, like the YOUCANIC full system scanner, to rest the airbag light if you trigger it. To be safe, disconnect the battery.
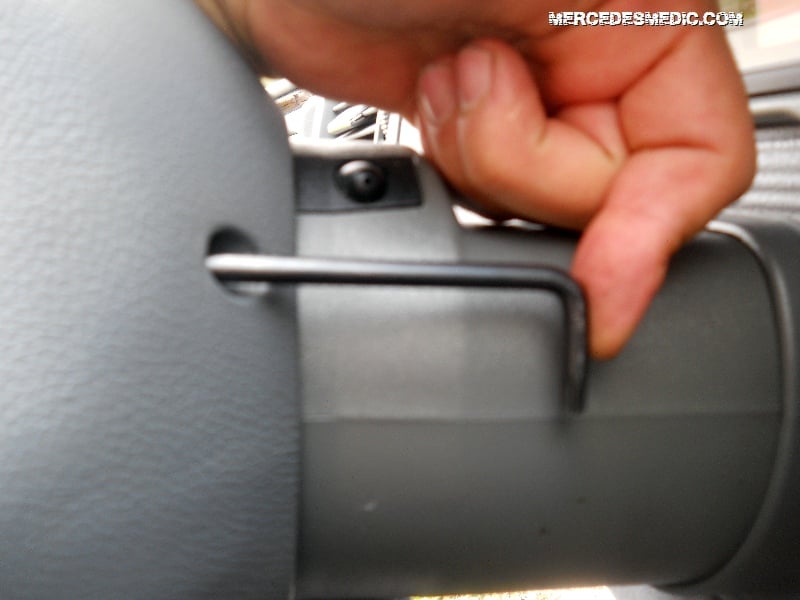
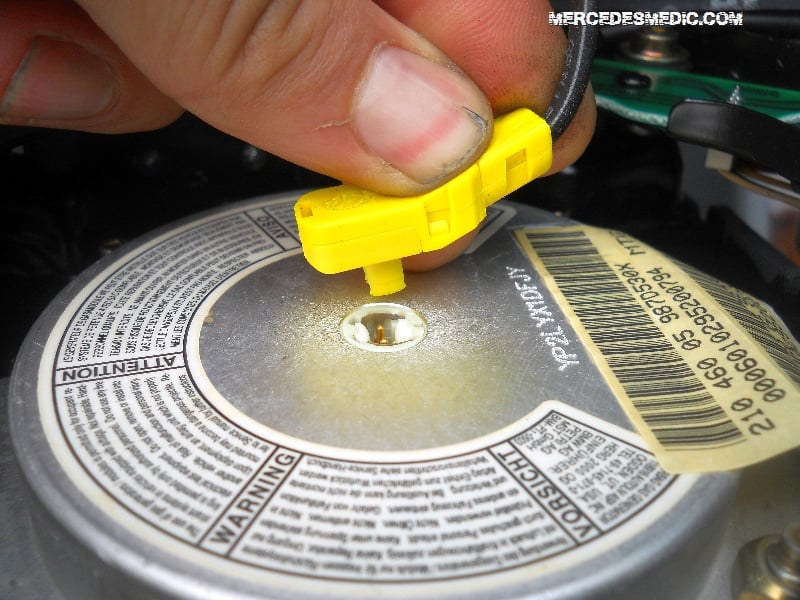
- Remove the airbag
The airbag is held in place with two bolts. You will notice two small holes in the steering wheel’s back. This is where you insert the hex or torx bits to loosen the bolts. The airbag bolts do not come out entirely. Continue unscrewing them until they feel straightforward to rotate. Disconnect the airbag electrical connector. Unplug the connectors that go to the steering wheel buttons as well. Disconnect the airbag.
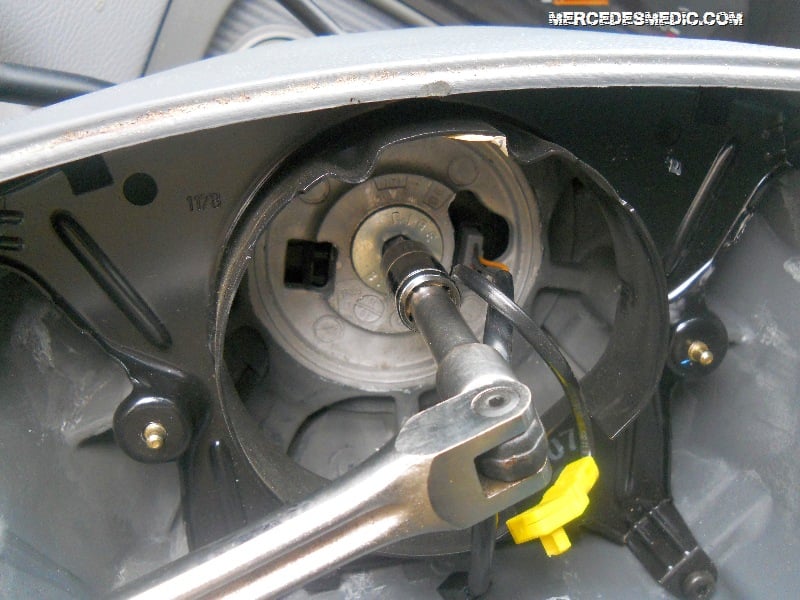
- Remove the center bolt.
Use a breaker bar to remove the center bolt. Have someone help you by holding the steering wheel in place as you try to break free the center bolt. Note the grooves in the center of the steering wheel before you pull it out. You can use a marker to make a line on the shaft. This will help you when you install the steering wheel later. Making sure the grooves match just like before. Otherwise, you will drive down the road with the steering wheel off-center.
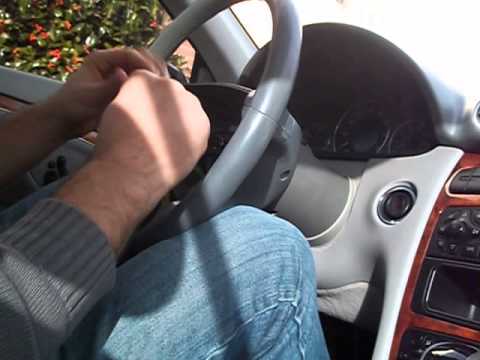
Watch this video on replacing the airbag and steering wheel if you need help.
- Disconnect the battery
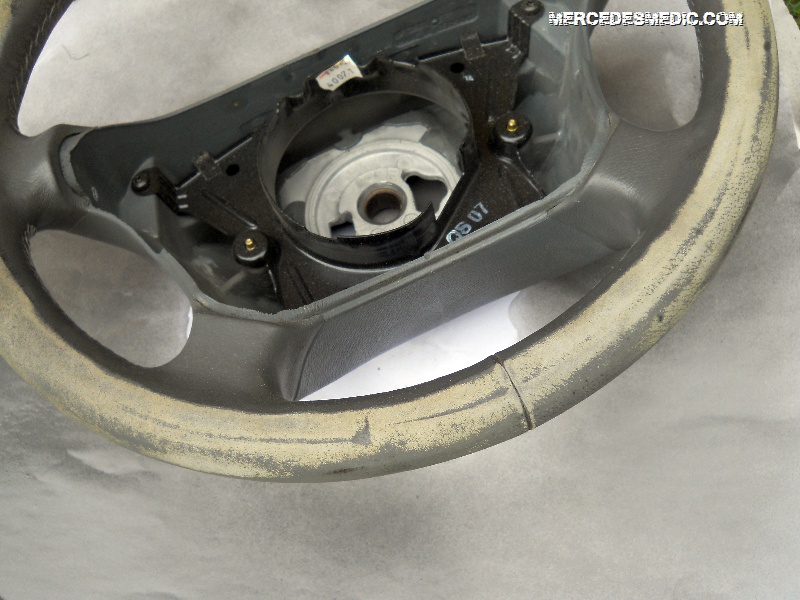
- Sand and Clean the Steering Wheel. A lot!
Use sandpaper to remove any cracks that you may have. Make sure to finish with fine sandpaper, at least 500 grid paper. Be careful in this step. Do not sand too much, or the steering wheel may lose its round grip. - Prepare the steering wheel.
If you have significant gaps or cracks on the steering wheel, you may consider using a filler to fill the gaps. Let the filler dry for several hours before sanding, cleaning, or painting. Make sure the steering wheel is clean and doesn’t have any dust before you start spraying. You could also use carbon fiber cloth and resin to fill large gaps or badly worn steering wheels. Here is an article by Doug Lepak, The Steering Wheel expert who uses carbon fiber to restore an old steering wheel. You will likely not need carbon fiber repair unless you fix an antique car. -
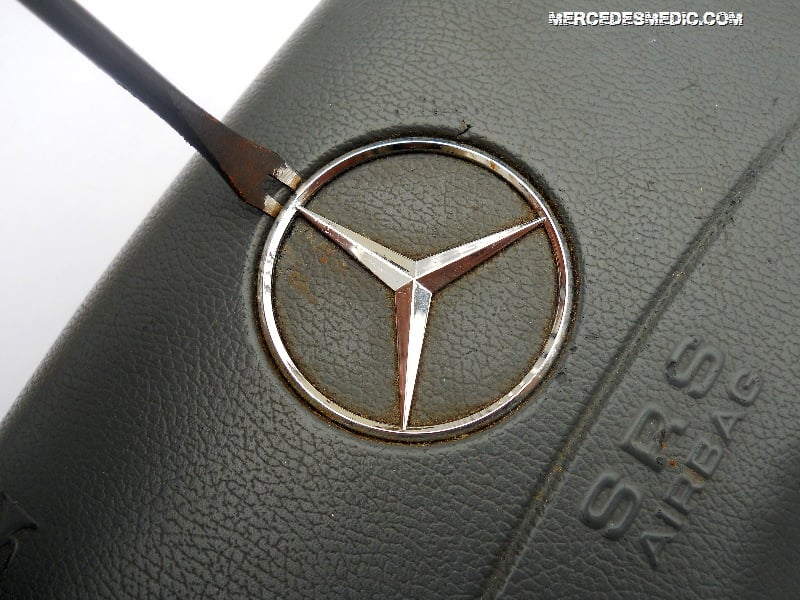
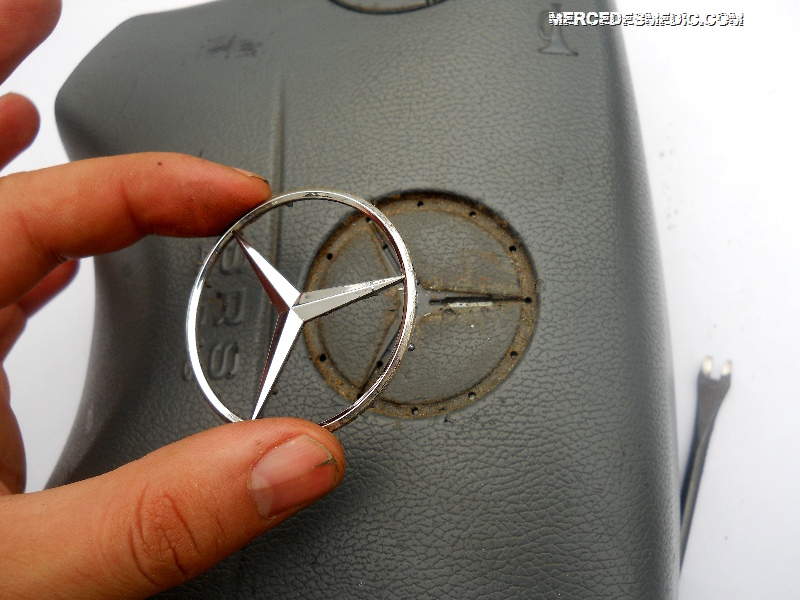
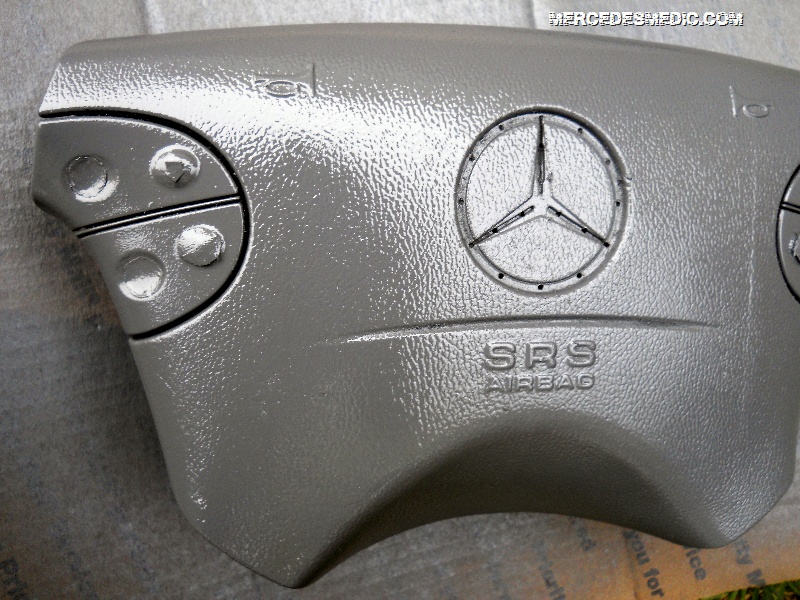
Remove the Three-Pointed Star from the airbag.
This is a tricky task. It would be best if you were careful not to break the star. The star may be plastic, as in our case. You can use a small tool to pry out the star. There are a few pins that stick on the back of the star. You can use your favorite glue when reinstalling the star if they break.
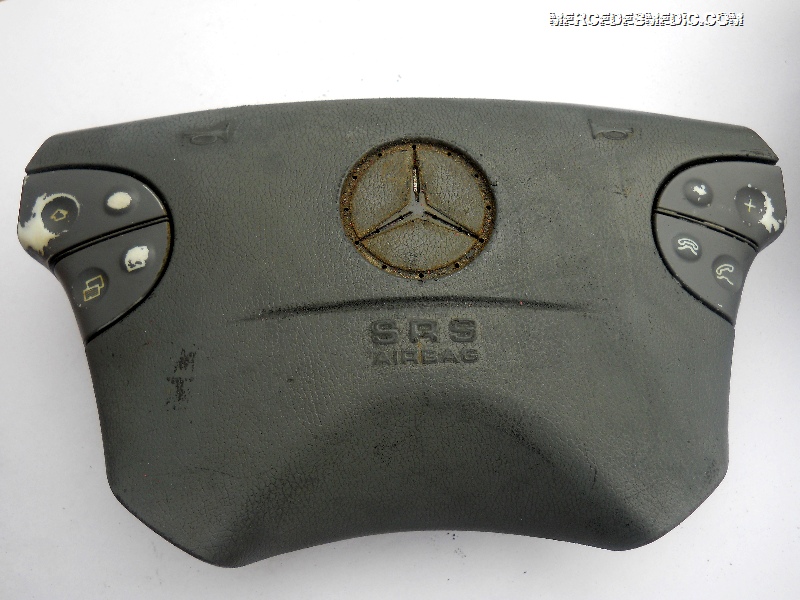
Look at this airbag. This airbag looks so bad you wish it never expires, even in case of an accident. -
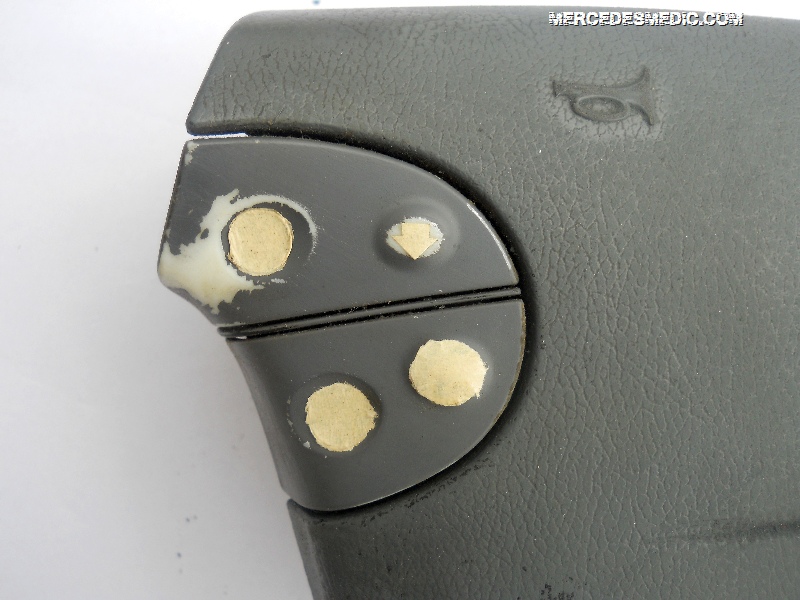
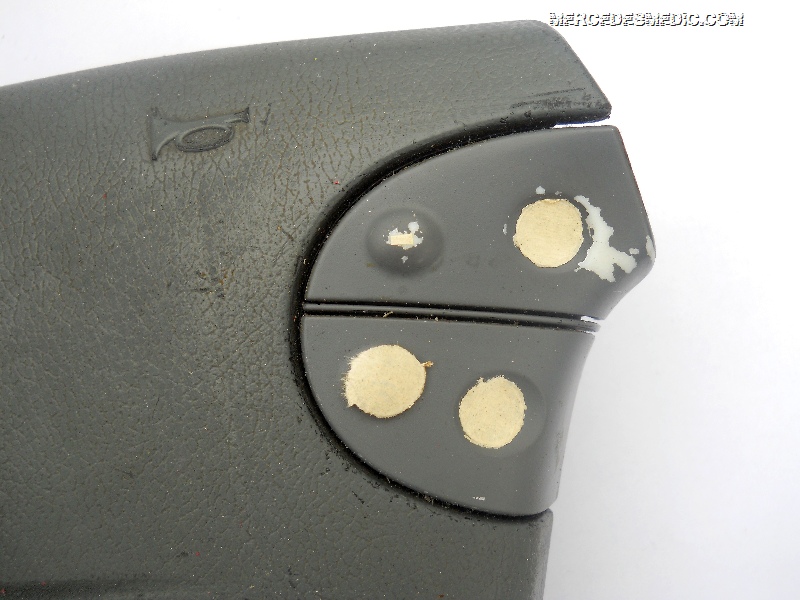
Steering Wheel Buttons
The buttons wear out, and you can no longer see the symbols on the steering wheel. You can cut out a + and – sign and place it on the corresponding buttons. For the other buttons, you can just cut out a round sticker on top of the controller. At least, this is what we did. We also cut out a down arrow, as shown below. Suppose you have a better suggestion, share it in the comment section below.
Check out the (-) sign that we made using masking tape. - Use Adhesion Promoter
Clean the steering wheel with a dry cloth. Spray a thin layer of adhesion promoter. Wait 15 minutes as spray a second thin layer. If you have any drips, make sure to smooth them out. - Spray Pait the steering wheel
Here comes the best part. Ensure you work in an environment with at least 60 degrees Fahrenheit (°F). Spray one thin layer of paint. Let it dry for at least 15 minutes. Spray again. Let the paint dry again. Repeat this process at least three times, even more, if the wheel absorbs the dye. You want an even paint distribution, and the Color should be the same. Keep your spray can at least 6 inches from the steering wheel when spraying. Now spray the airbag too. Do three light coats and take 15 minutes to break between each application. - Clearcoat
If you went through all this trouble, you should also consider spraying a clear coat. Not only will it protect the paint that you sprayed, but it also will make your steering wheel look great. - Install
Let the paint dry for at least 4-5 hours. The Color will not cure entirely, typically in 24 hours. Be careful, as the steering wheel may be sticky. If your circumstances allow, it is best to let the paint fully cure before installing the steering wheel back. Install the steering wheel in reverse order. Make sure to tighten the center bolt and connect the airbag wires.

Tips
If your steering wheel has excessive cracks, you have two options. You can use a filler, or you can sand it down. If you decide to sand it down, note that the steering wheel (cross section) may not be perfectly round. The filler option will look better, but it may not last long. Make sure to clean the steering wheel and the gaps as much as possible if you go this route.
If you have any suggestions, please share them in the comments section below.


