Symptoms: Noise Under the Dash
 When you start your Mercedes-Benz, or even just turn the AC on, you hear a clicking sound (at times a shhh sound) from the dashboard. The sound lasts for about 20 seconds and then goes away after approximately 5 minutes. Later on, however, the ticking returns and repeats its cycle.
Other times, you may feel that the fan speed is not normal. It speeds up and slows down all of a sudden. You may also notice that there is no air blowing on the floor.
Problem:
The clicking sound and the rest of the symptoms may be attributed to a broken stepper motor lever or the footwell damper linkage. This is a common problem in MB C230, C240, C320, CLK320, CLK350, and CLK500 but this problem can affect other Mercedes-Benz models such as E, S, CLS, GL, and ML-Class.
Another common problem is the air conditioner vent flap getting stuck. This is typically due to a worn-out or failed vent flap motor.
Solution:
 If it is indeed the linkage that’s broken, you have to replace it. Linkage replacement may be the best solution.
The linkage itself is relatively cheap. However, the process of replacing it takes hours, especially for beginners. If you would like to take it in, repair centers charge up to $500 for their service due to the time required to disassemble and reassemble dashboard components.
The stepper motors could also be defective and get stuck in an open or closed position. We know you want to save as much money as possible, so here is the simplified tutorial for replacing it.
What you need:
- Linkage replacement
- Flashlight
- 6 0r 12 pt. 10m socket
- T35 3/8” Torx socket
- T20 Torx screwdriver
- 3/8” ratchet
- 6” to 12” 3/8” extension
- plastic wedge
- pocket screwdriver (with flat tip)
Step 1
Using the plastic wedge, gently pull up the front of the shifter surround trim. Remove any connections and the shifter as well. Remove the entire surround trim.
Step 2
Pull out the rubber insert in the cup holder area using your fingers until you see two 10mm screws. Unscrew them
Step 3
Open the center console until the other two 10mm screws are exposed. Remove them as well.
Step 4
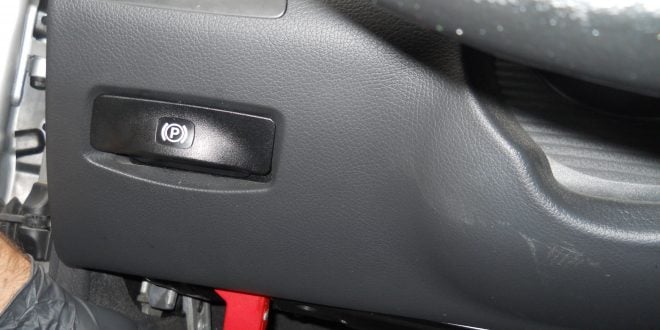
Engage the parking brake.
Step 5
Press forward the black tab near the bottom right of the shifter and put the gear selector in neutral. Pull the entire assembly.
Step 6
Locate the T35 screws under the plastic hump where the ashtray was. Loosen the screws to about 90 degrees.
Step 7
Locate the other two screws under the AC controller, then remove them using the T20 Torx screwdriver. Detach the center console as far back as you can.
Step 8
Above the radio, locate the small plastic tabs on the left side of the AC vents. Pry the lower tab until a thin open slit is exposed then locate two small torx screws. Loosen the screws. Do the same for the other side of the vent until you can remove the radio trim.
Step 9
In the radio area, remove the screws until you can pop the lower dash section.
Step 10
Loosen the small section of the dash around the glove box.
Step 11
Remove the vents on both sides of the center console and the tabs that hold the black cage to the dash.
Step 12
Locate the stepper motors and the broken linkage. Replace what’s broken.
Step 13
Re-sync the stepper motors by turning the ignition on. See if it works properly.
Step 14
Once you’ve tested that everything works normally, put back all the parts removed.
Note: In all these steps, you must be careful not to damage your interior. Also, note that the car must be turned off the whole time.
For more detailed instructions, please click here, here, and here. These led to one process but were divided into three parts.


I’m going to shine some light since I already replace (1) stepper motor for M2/10; M2/15 on my 2004 CLK. There is a beam in front to remove this beam you have to remove the wiper arms wiper front crowl and there is a nut on the firewall this have to be remove. Also to remove the upper dash there are a tabs on the far left side and far right side under that tap are a single screw maybe torx can’t remember. Once you remove those screws the dashboard should come out after you remove everything mention in the article.
Also forgot to mention DO NOT again DO NOT bend the fiber optic cable that mounted behind the HU.
I am so aggravated with my 02 C320 Wagon AC/heating system…!!
One side cools the other side heats up…??
Annoying clicking noise after start…
Jeep Wrangler has a much better direct control for heating and AC
Thanks for the information, I think that’s very kind & helpful of MB Medic to help peoples